Training for Hiking: Nature’s Obstacle Course
Thank you to Liam Kruse, our amazing physiotherapy student, for contributing this blog! Enjoy!
Throughout the past years I have found hiking and backpacking to be enjoyable as well as physically challenging. Growing up, I played baseball competitively and I did not get the opportunity to attempt many sports or activities outside of baseball. I attended a baseball academy and during the fall we would hike PKOLS (Mount Douglas Park); this was an activity I always looked forward to and it was where my love of hiking began. Something else I enjoyed growing up was camping; I loved getting out into nature and immersing myself in an environment much different than my urban hometown of Victoria. I was introduced to backpacking when I was attending the University of Victoria and I instantly fell in love with the idea of it; it combined two activities which I loved and it was something that I wanted to pursue when I had the opportunity to do so.
“I took a walk in the woods and came out taller than the trees.”
This year I will be hiking The Rockwall, a 4-day backpacking trip which spans 56kms through the Kootney National Park and has approximately 3000 meters of elevation gain. An extra challenge presented by backpacking journeys like the Rockwall is carrying 25-40lbs of gear with you, which increases the difficulty of the trip significantly. To meet the demands of trips like the Rockwall, I am recommending some exercises and activities for backpackers.
When preparing a program, it is important to consider the basic training principles. These include overload, specificity, individuality, and reversibility (detraining). Overload means tissues like muscle, bone and cartilage need to be exposed to greater forces than normal to adapt and grow; furthermore, the program needs to be progressed and continually challenge the body in order for us to see changes. We can overload tissues by manipulating frequency, duration or intensity of the exercise we are completing. To apply this idea to hiking or backpacking, we wouldn’t start with a 20km hike, we would start at a distance shorter than that, let’s say 2km and slowly progress the distance until we reach our desired length. The next training principle that needs to be considered for backpackers is specificity: hiking is endurance based and requires sustained periods of physical output. To align with the principle of specificity the program will be endurance based but will include elements strength, power and flexibility as these are frequently encountered during hiking. Individuality is similar to specificity; this principle states that everyone responds differently to training and programs should account for individual differences. Aspects like this are hard to account for within generalized programs, but there will be alternatives to specific exercises or amounts of rest depending on your fitness level, preferences and available time. Lastly, the final principle outlined in this program is reversibility: this is the use it or lose it principle. Keep exercising and continually applying the overload principle and you should be okay.
If you have no previous background in exercise and are generally unsure of your health status, following up with a healthcare professional or completing a PAR-Q+ or Get Active Questionnaire can be a great way to get started (links to these forms can be found here and here).
Aerobic Fitness
The first and one of the most essential aspects of fitness needed to complete a backpacking journey is aerobic fitness. If you aren’t doing aerobic activities regularly it will be hard to start a journey like the Rockwall where some days of hiking are almost 20kms and have 2000 meters of elevation. The real question is how do you train your cardiovascular system for a hike like this? Let’s keep it simple, you should hike. I know you might be unsatisfied with this answer but when considering the principle of specificity this would be the best possible option. Other options that could work well if you don’t have the time to go for a hike are using an inclined treadmill or using a stair climber. When considering the progressive overload principle, it’s important to increase the amount of activity you do each time you exercise; therefore, you can increase the length, speed, elevation or load (i.e. putting on a backpack). Adding weight to your backpack is known as rucking and it is a great way to increase the intensity of your hike. Choose a comfortable backpack to load up with weight; ideally, you would use the backpack you will be using while hiking. Lastly, to account for individuality, start somewhere where you know you can succeed.
The Canadian Society of Exercise Physiology (CSEP) recommends that we accumulate at least 150 minutes of moderate-vigorous physical activity a week. I would encourage to split this activity throughout multiple days of the week. I enjoy doing 30 minutes of aerobic based activity across 5 separate days a week and accumulating more vigorous activity during my strength workouts. However, you could definitely complete a longer hike (2-3 hours) and complete the majority of your activity then. Feel free to experiment, the numbers presented by CSEP are general and it takes some self-reflection and manipulation to find what works best for you and your own unique situation.
Exercises:
Due to the endurance nature of hiking, a higher rep count and lower load should be used. Reps should range from 15-20 and a load around 70% of your 1 rep max (1RM). Most exercises should be tried without load to begin and progressed accordingly using a 1RM chart or calculator. For each strength exercise 3 sets should be completed with 30 seconds-1 minutes of rest. CSEP recommends strength training at least 2x/week. I enjoy doing this a bit more depending on the week; however, completing two strength sessions and increasing as tolerated is a great place to start. I would recommend working your way up to 3-4 strength sessions each week and completing longer or more intense aerobic sessions on your days off from strength training. Therefore, the dose would be:
Load: 70% of 1RM
Sets: 3
Reps: 15-20
Rest: 30s-1 min
Sessions/week: 2-4
Strength:
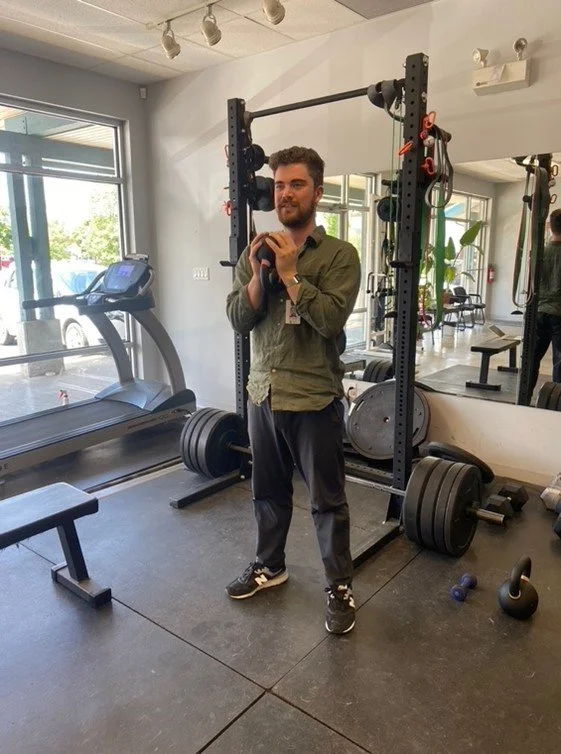
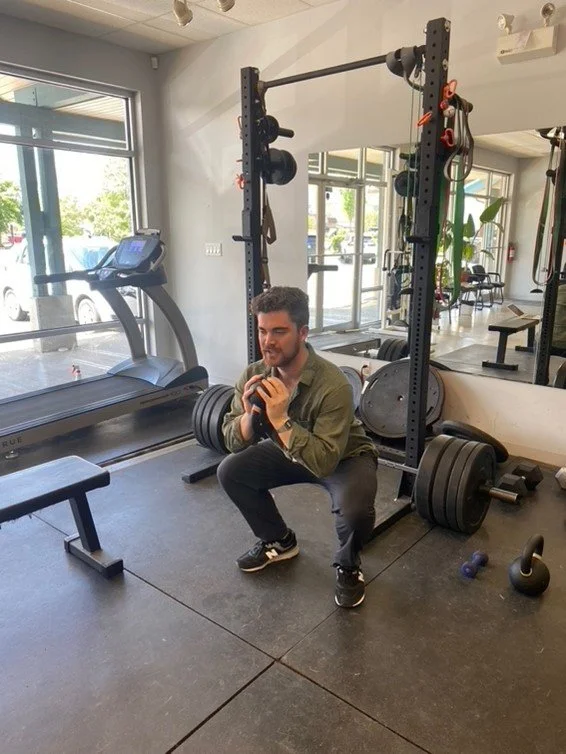
Squats: This exercise targets lower limb strength and is a pillar of any strength and conditioning program. Ascents and descents require significant lower limb strength, especially when you are carrying a backpack with significant load. When completing this exercise ensure you have an upright torso, your feet are shoulder width apart and keep your knees over toes as well as pointed outwards. A barbell, dumbbell, kettlebell, or band can be used to add load to the movement.
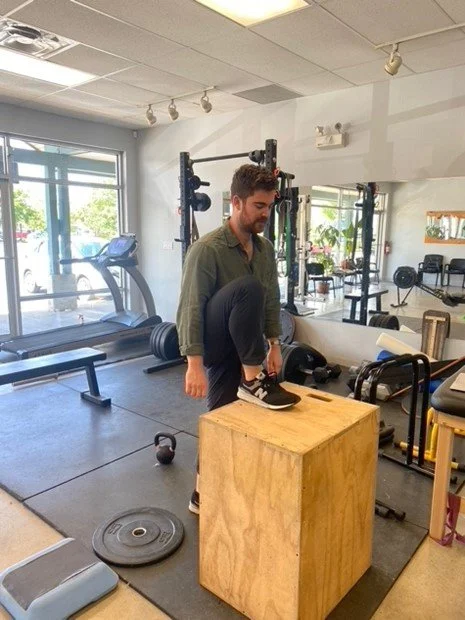
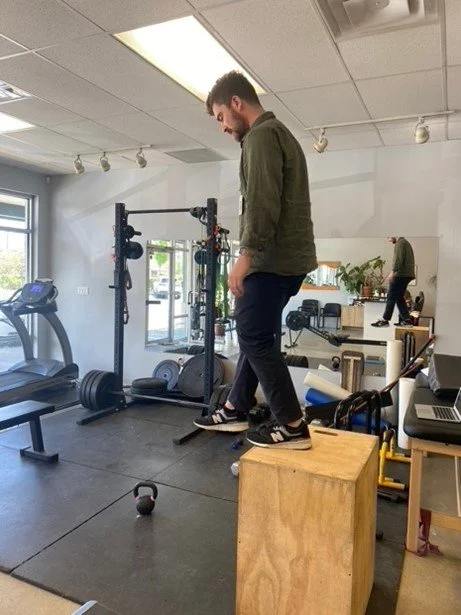
Step-ups: Throughout a hike you will take steps of various heights. When performing a sustained ascent this can be very fatiguing; therefore, it’s important to train this movement in a strength program. This exercise targets the hip and knee extensors. The exercise can be progressed by increasing the height of the step and/or adding load. Make sure to lift mainly with the leg stepping onto the box and maintain an upright torso (unlike me).
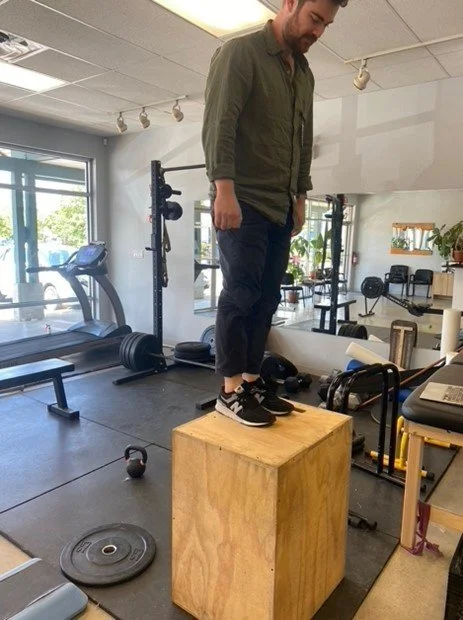
This features a high box height, start where you are comfortable and go from there.
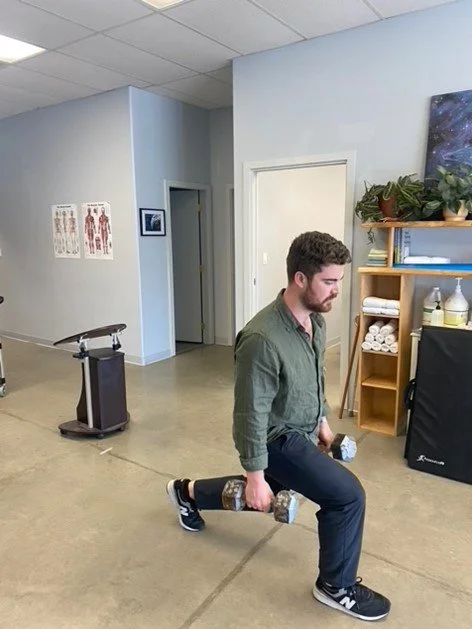
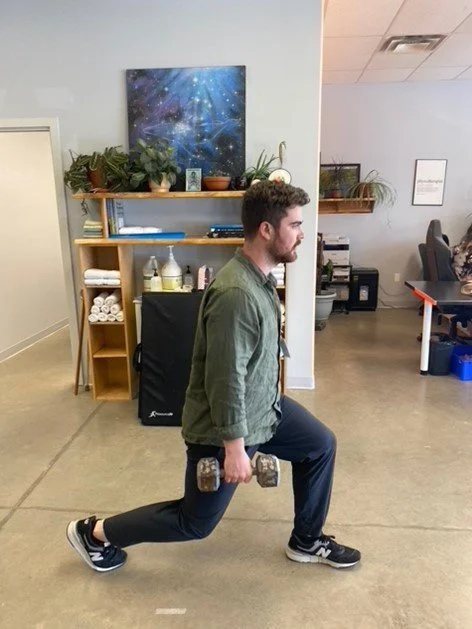
Walking lunges: Lunges are a fantastic exercise to build global lower limb strength. Much like a squat they are an integral exercise in any strength and conditioning program. Incorporating lunges with high repetitions and load will help make long days on the trail a breeze. It’s important to take steps with a moderate length and lower down slowly so your knee is just above the ground, as always keep an upright torso throughout the exercise. A barbell, dumbbell or kettlebell can be used to add load to the movement.
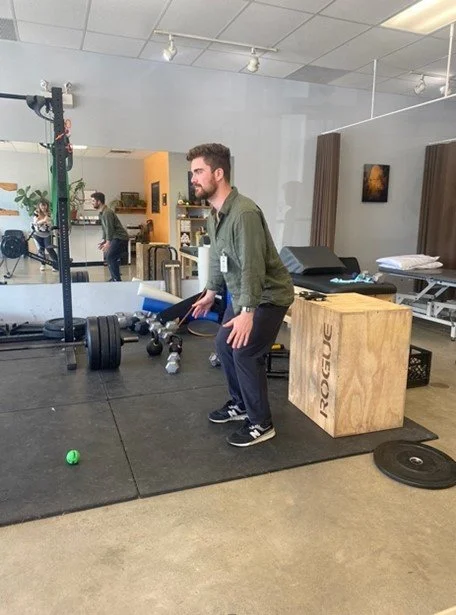
Box drop to squat: When descending on a hike your body has to absorb significant forces due to gravity, your body weight and gear. This exercise teaches your body to deal with these forces in a controlled manner. This exercise should begin with a small drop you feel comfortable with, hover over the box with one foot and drop onto the ground; you shouldn’t be jumping off of the box. During your landing it’s important to land in a mid-squat position.
Start by hanging off the box and land in a mid-squat position to absorb the force.
Core:
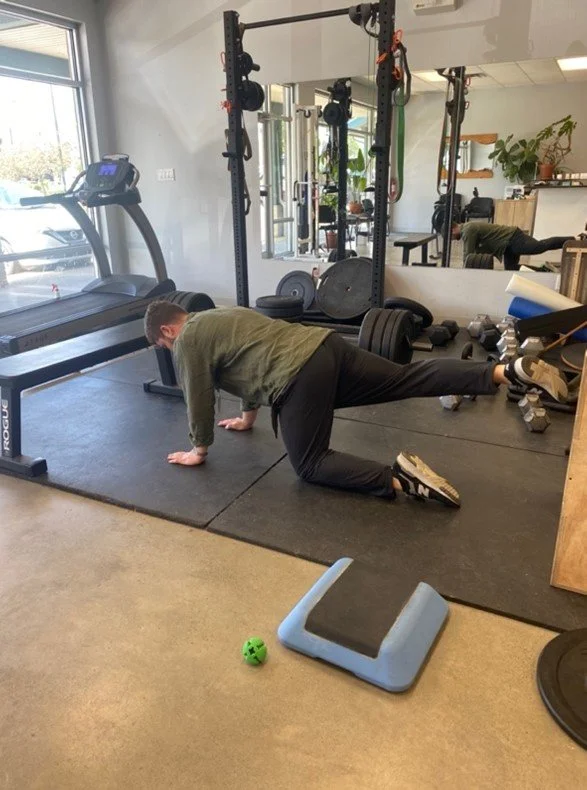
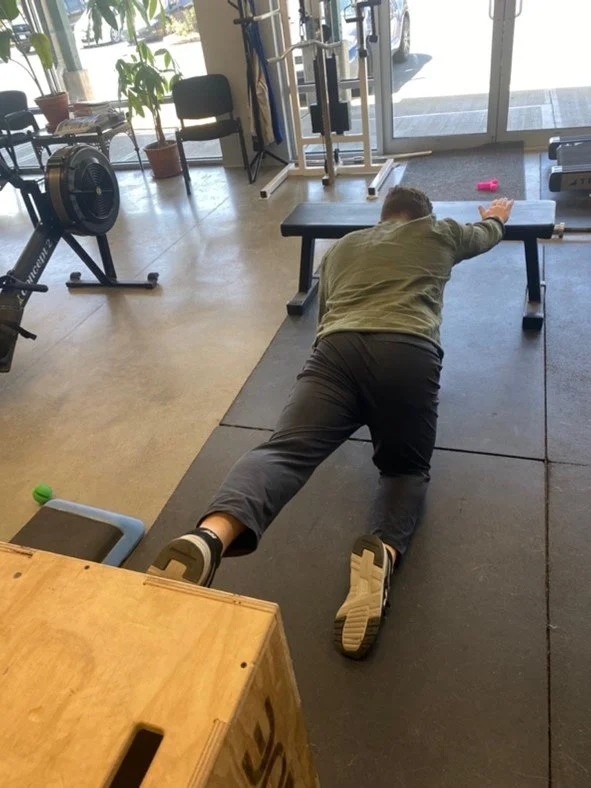
Bird Dog: The bird dog is an excellent exercise for global core strength and stability. Begin by just moving the arms or legs separately in isolation, the exercise can be made more difficult but lowering opposite arms and legs and alternating between the two. Ensure the back is kept flat and the hips do not shift from side to side during the exercise, imagine you are balancing a hot plate of food on your back. You can place a ball or foam roller on your back to cue yourself to keep a neutral spine.
Leg only variation.
Opposite leg and arm progression.
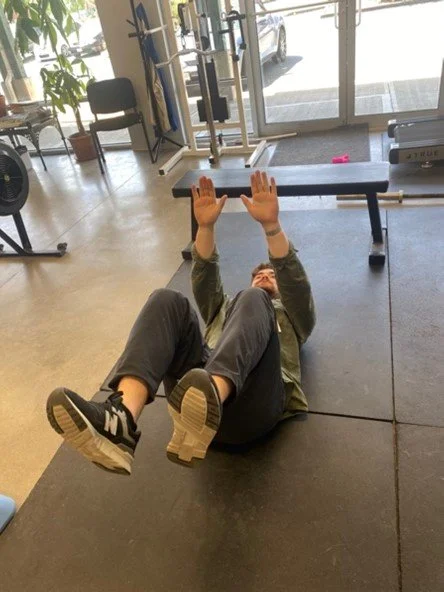
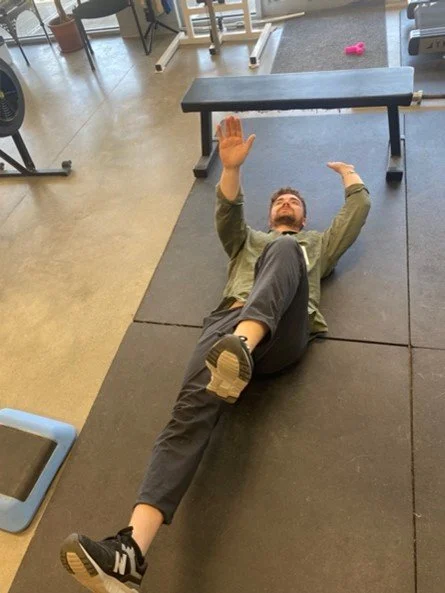
Dead Bug: Much like the bird dog, the dead bug works on the core globally. Be sure to press the lower back into the ground removing the natural curvature of the spine, this is called a posterior pelvic tilt and helps engage the core musculature. Like the bird dog you can start by moving the legs in isolation then progress to moving opposite arms and legs at the same time.
Start position.
End position when doing alternate leg and arm version.
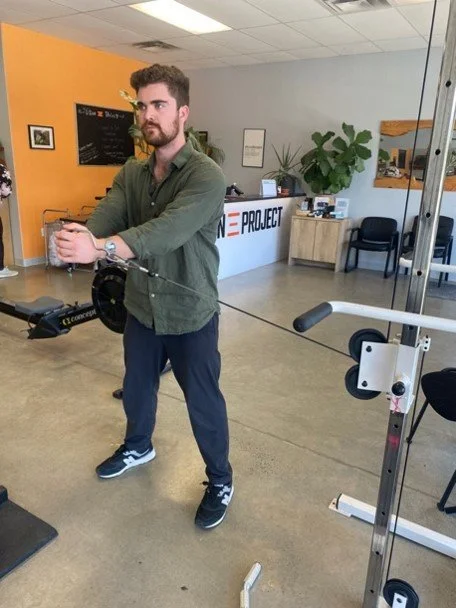
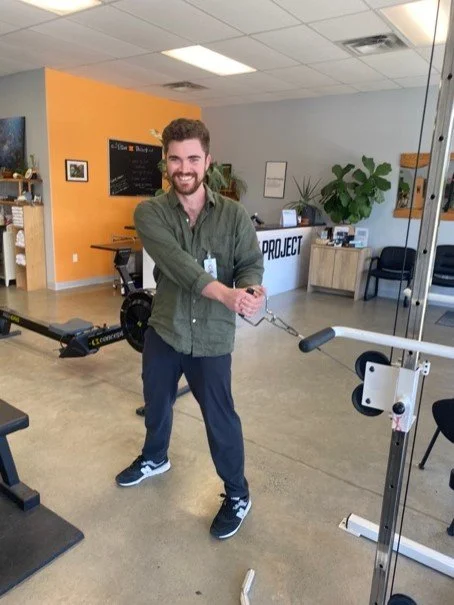
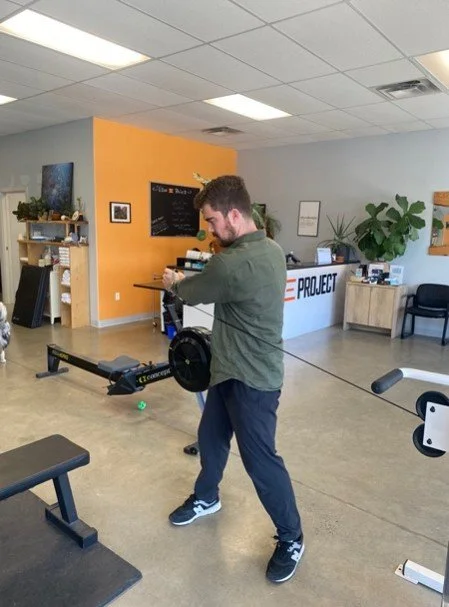
Pallof Press: The Pallof press works on core stabilization and strength by introducing a torque to the body, encouraging body to rotate with the band or cable. The goal of the exercise is to maintain the stable body position and resist the torque introduced by pushing the band or cable outwards. This will build static core stability and help with long days on the trail when your backpack is shifting position and your body needs to resist this unwanted shift in force. Keep the cable or band around belly button height, push outwards while keeping your body square. Make sure to switch sides.
Banded/Cable Rotation: This exercise strengthens the core dynamically compared to the Pallof press which strengthens the core statically. This exercise should be performed with a slight bend in the knees and straight arms; the rotation should be controlled in both directions. This will help with the quick changes in direction needed when navigating the trail. Make sure to switch sides.
Proprioception/Dynamic stability:
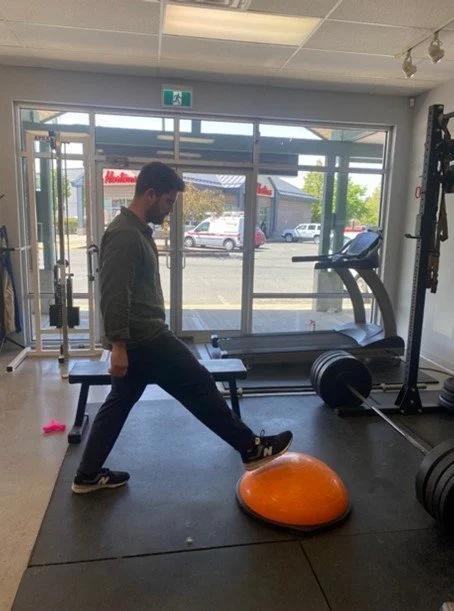
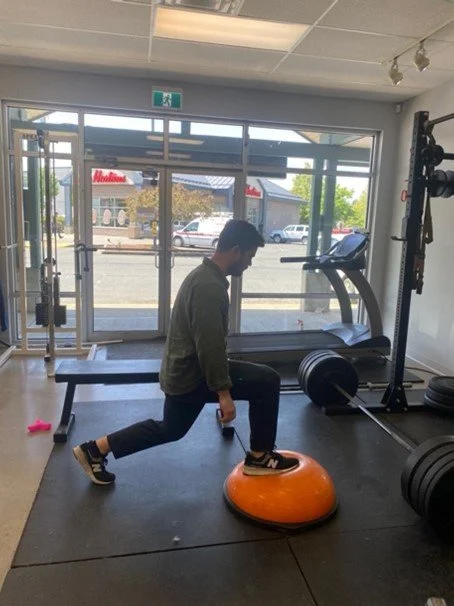
Lunge to Bosu: After doing this exercise, your ankles will thank you when you step on an unexpected root or rock. This exercise works on proprioception, which allows for your body’s awareness in space. When stepping onto the Bosu your ankles and calf muscles will have to make quick corrections to accommodate the unstable surface of the Bosu ball. It’s important to start slow and small on this exercise, your body will be unfamiliar with having to react quickly to the Bosu; even marching on and off the Bosu can be an appropriate place to start. Start with no load and progress as needed, this exercise is about control and focus should be placed on maintaining a stable position throughout the exercise.
Skaters: Skaters are excellent for dynamic balance and overall athleticism. Focus on landing in a stable position before hopping to the other leg and jump from side to side as quickly as possible while also maintaining control. This exercise will be helpful when jumping to avoid a puddle or mud on the trail.
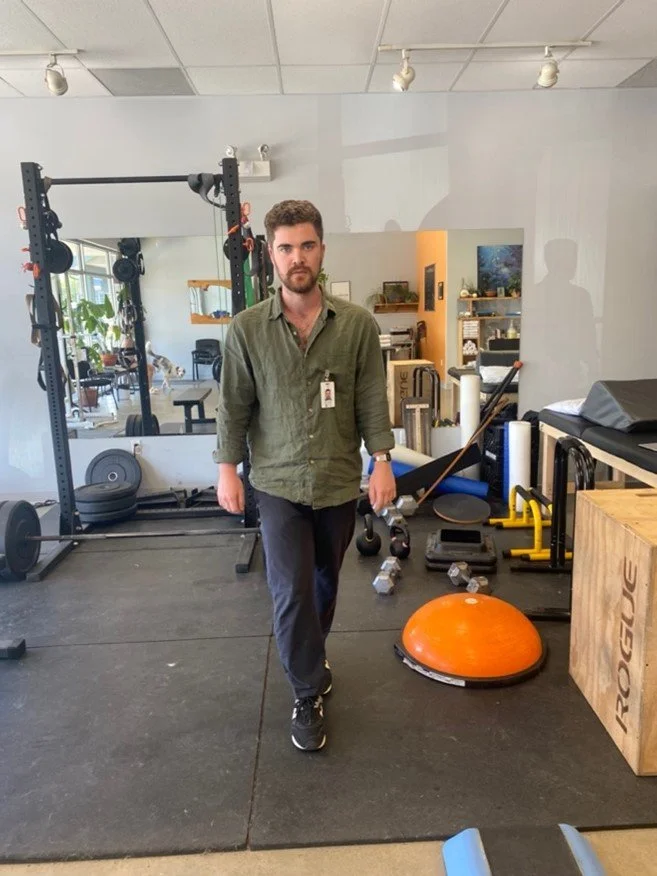
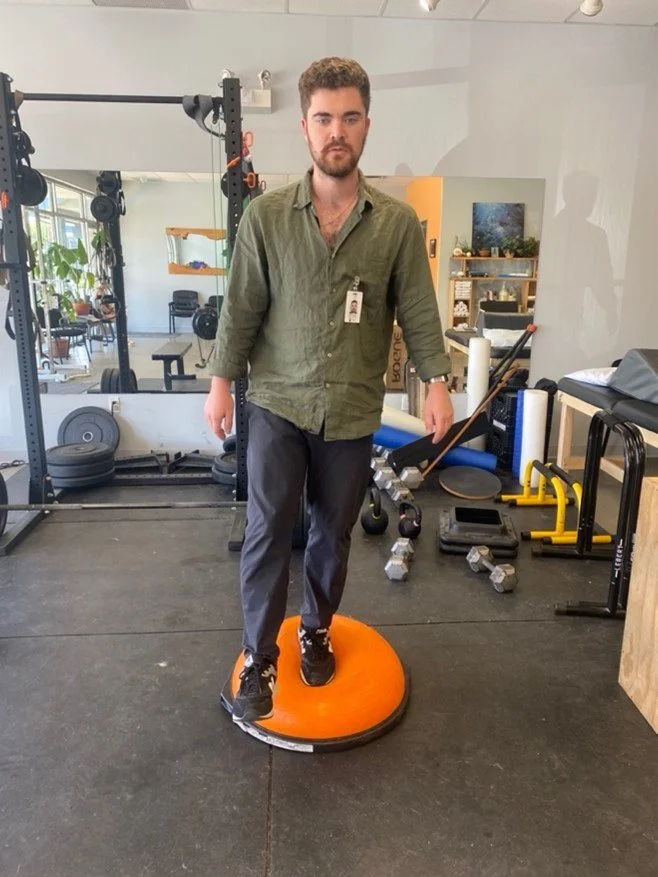
Tandem Stance or Bosu balance: These exercises help with static balance and proprioception of the ankles and lower limb muscles. Ankle stability, strength and balance is essential when walking on uneven trails and navigating technical sections of trail. Start with tandem stance and progress to more difficult variations like balancing on a Bosu ball. Closing your eyes can make both exercises more challenging as well as balancing on one leg on the Bosu. Squats can be added to the Bosu ball to also add a strength element. These exercises are very modifiable and can be tailored to your individual needs. Try balancing for 15-30s and do a total of 1-2 mins.
Tandem stance, widen feet to make it easier.
Single leg Bosu balance progression.
Obstacle course: An obstacle course can be utilized as a fun and entertaining way to implement proprioceptive and balance training into your program. Find some things around home or take a trip down to the local park and try playing a game like the floor is lava. You’ll find it’s a challenging but more stimulating way to work on balance compared to more conventional exercises and provides a great contrast to some of the exercises mentioned above.
“Everyone wants to live on top of the mountain, but all the happiness and growth occurs while you are climbing it.”
Thanks for reading! We hope you enjoyed the contribution from Liam.


